Mastering Corridor Design in Civil 3D for Efficient Site Planning 🏗️
Learn expert tips on leveraging corridors in Civil 3D to optimize site design. Discover step-by-step techniques and best practices to enhance your civil engineering projects. Watch now!
Autodesk786
430 views • Jan 27, 2025
About this video
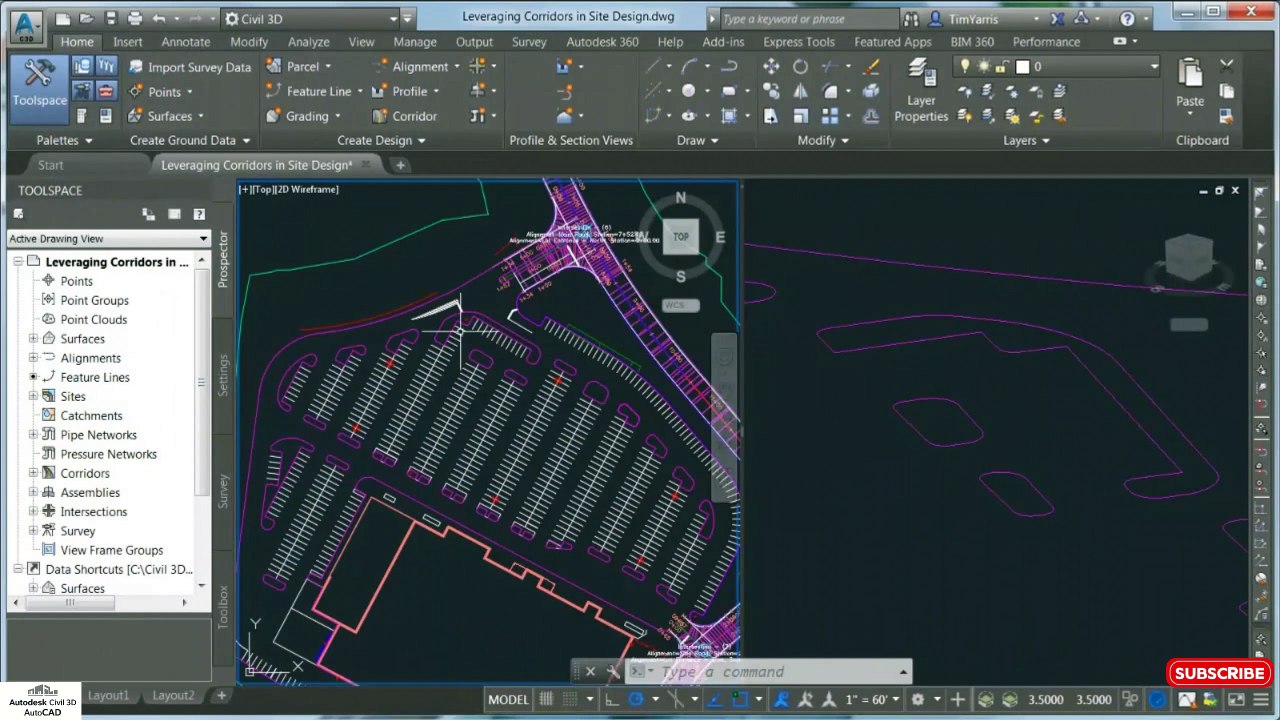
https://dai.ly/x9d2fm6<br />https://dai.ly/x9d176m<br />https://dai.ly/x9cytxm<br />https://dai.ly/x9cyqdo<br />https://dai.ly/x9cyhh4<br />https://dai.ly/x9cvrfi<br />Leveraging corridors in site design within Civil 3D provides a dynamic way to model roadways, parking lots, grading, and other site features. Corridors are highly customizable and enable designers to integrate alignments, profiles, assemblies, and surfaces into a seamless design process. Here's a step-by-step guide on how to effectively use corridors in site design:<br /><br />1. Understand the Role of Corridors in Site Design<br />Corridors aren't limited to roadway design—they can be used to model:<br /><br />Parking lots and driveways<br />Sidewalks and pathways<br />Grading for curbs, gutters, and drainage<br />Intersections and roundabouts<br />Retention basins and channel slopes<br />Corridors are built from alignments (horizontal layout), profiles (vertical layout), and assemblies (cross-sectional design).<br /><br />2. Create and Prepare the Site Plan<br />Add Alignments:<br /><br />Use alignments to define road centerlines, parking lot edges, or other site features.<br />Go to Home Create Design Alignment Create Alignment from Layout to draw the desired geometry.<br />Add Profiles:<br /><br />Create profiles for each alignment:<br />Go to Home Profile Create Surface Profile.<br />Draw design profiles for road slopes, driveways, or parking lot grading.<br />3. Build Corridors<br />Create a Corridor:<br /><br />Go to Home Corridor Create Corridor.<br />Select an alignment, a profile, and an assembly to define the corridor.<br />Use Assemblies for Site Design:<br /><br />Use pre-built or custom assemblies that match your site features:<br />Road assemblies with curbs and gutters for parking lots.<br />Sidewalk assemblies for pedestrian paths.<br />Simple grading assemblies for berms or channels.<br />4. Model Transitions and Intersections<br />Set Baselines for Transitions:<br /><br />For areas like intersections or driveway entrances, add additional baselines to the corridor.<br />Alignments and profiles for baselines should match the desired geometry of transitions.<br />Use Region Targets:<br /><br />Target surfaces, alignments, or feature lines for curb returns, lot grading, or driveway edges:<br />Select the corridor, right-click, and choose Corridor Properties.<br />In the Parameters tab, set targets for regions like width or elevation.<br />5. Incorporate Site Grading<br />Create Corridor Surfaces:<br /><br />In Corridor Properties, go to the Surfaces tab and create a Top surface or any other required surfaces from the corridor.<br />These surfaces represent the finished grade of your site.<br />Combine with Feature Lines:<br /><br />Extract feature lines from the corridor to refine grading for specific areas like islands or boundaries.<br />Use the Grading Tools to slope parking lots, retention basins, or pathways.<br />6. Analyze and Optimize<br />Volume Calculations:<br /><br />Use the corridor to calculate earthwork volumes for cut and fill analysis.<br />Go to Analyze Volumes and Materials.<br />Check Grading:<br /><br />Use the Section Editor to review cross-sections for proper drainage and compliance with design requirements.<br />7. Visualize the Site Design<br />3D Visualization:<br /><br />
Video Information
Views
430
Duration
1:30
Published
Jan 27, 2025
Related Trending Topics
LIVE TRENDSRelated trending topics. Click any trend to explore more videos.
No specific trending topics match this video yet.
Explore All Trends