Master Cinema 4D to After Effects Workflow: Part 1 of 3 (~25 mins) 🎥
Learn essential techniques for integrating Cinema 4D with After Effects in this beginner-friendly tutorial series by Tim Clapham. Perfect for boosting your motion design skills!

Maxon
80.0K views • Apr 3, 2012
About this video
Cinema 4D to After Effects and back again
In this collection of tutorials, Tim Clapham from Luxx - http://www.luxx.tv - explores techniques you can use when working with CINEMA 4D's multipass rendering in combination with the After Effects exchange feature of Cinema 4D.
The powerful multipass rendering and compositing exchange features of Cinema 4D allow you to access the individual render passes such as reflections, shadows and lighting from your 3D scene directly in your After Effects compositions, allowing you to grade and enhance your renders with ultimate control. Access to 3D data taken directly from your Cinema 4D scene and imported into After Effects ensures precise fidelity between native After Effects 3D elements and rendered elements from your Cinema 4D scene.
As well as discussing the exchange feature in-depth, Tim will demonstrate many useful techniques for working in Cinema 4D and After Effects, including scene management, basic lighting, MoGraph Color shader, MoGraph Multishader, Cloner Object, Effectors, Rigid Body Dynamics, and much more.
Tutorial 1: Cineam 4D to After Effects Basic
Taking you step by step through the process, Tim starts by covering the basic principles of working with multipass rendering and exporting 3D information from your CINEMA 4D scene over to your After Effects projects --- ensuring you use the correct colour management for outputting from CINEMA 4D and configuring your After Effects projects to make sure the files are composited in the right environment.
Tutorial 2: Cinema 4D to After Effects Advanced
The second tutorial then moves on to some more advanced techniques including the use of XPresso to export 3D information from specific clones and outputting lights as separate render passes. This information is then imported into After Effects and the 3D data used in combination with third party effects such as Trapcode Particular and Video Copilot Optical Flares.
Tutorial 3: After Effects to Cinema 4D
Finally, Tim takes us through the process of transferring your After Effects information over to Cinema 4D. Using The Foundry Camera Tracker, you will track and solve some footage, resulting in an After Effects camera and reference nulls being created. This camera and null information will be exported from After Effects into Cinema 4D and used to build some basic proxy geometry for catching shadows and reflecting the environment. This is then output using Cinema 4D's multipass rendering and composited back over the original footage in After Effects.
Cinema 4D to After Effects Basic: Part 1 (~25mins)
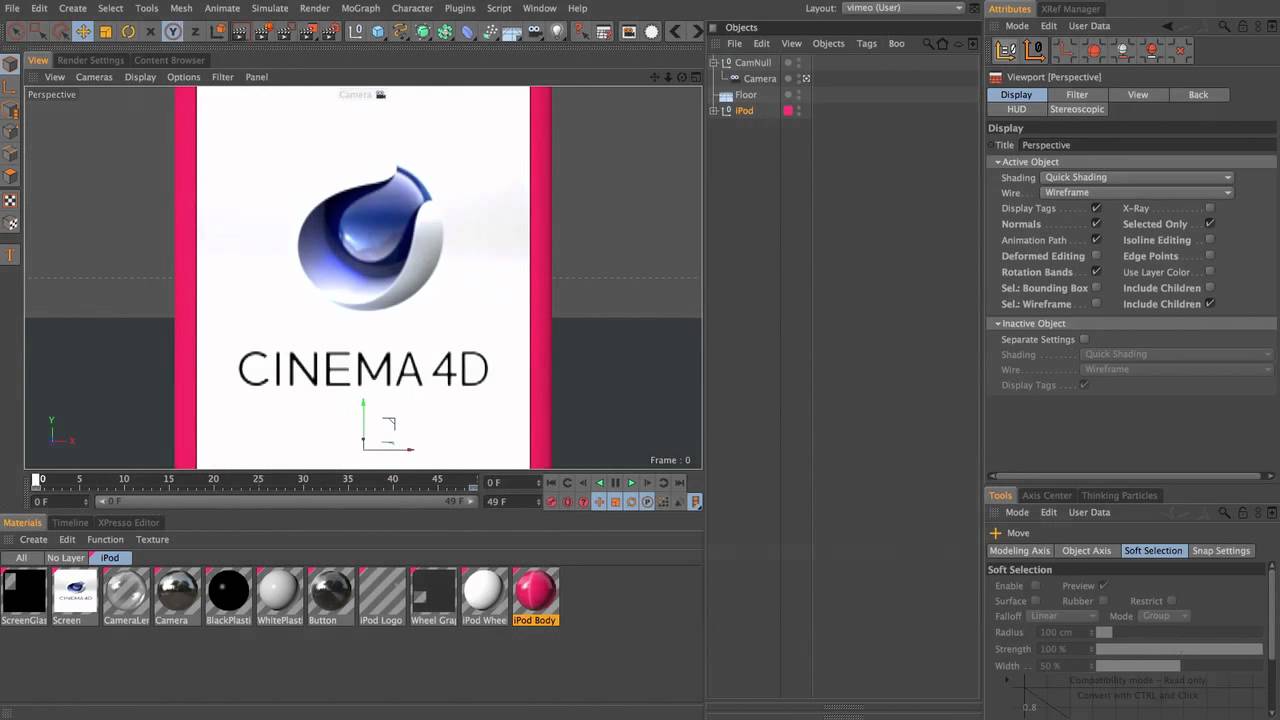
In the first part of the tutorial, Tim shows you how to install the Cinema4DAE plugin into After Effects and walks you through the setup for the free iPod model. In Cinema 4D, you will animate the iPod model and a scene camera, manipulate the animation curves in the F-Curve manager, create some basic materials, and use the Layer Manager for organising the scene.
See other tutorials about Cinema 4D and After Effects:
http://www.youtube.com/playlist?list=PL099EA0C53AED93E6&feature=plcp
-----
In this collection of tutorials, Tim Clapham from Luxx - http://www.luxx.tv - explores techniques you can use when working with CINEMA 4D's multipass rendering in combination with the After Effects exchange feature of Cinema 4D.
The powerful multipass rendering and compositing exchange features of Cinema 4D allow you to access the individual render passes such as reflections, shadows and lighting from your 3D scene directly in your After Effects compositions, allowing you to grade and enhance your renders with ultimate control. Access to 3D data taken directly from your Cinema 4D scene and imported into After Effects ensures precise fidelity between native After Effects 3D elements and rendered elements from your Cinema 4D scene.
As well as discussing the exchange feature in-depth, Tim will demonstrate many useful techniques for working in Cinema 4D and After Effects, including scene management, basic lighting, MoGraph Color shader, MoGraph Multishader, Cloner Object, Effectors, Rigid Body Dynamics, and much more.
Tutorial 1: Cineam 4D to After Effects Basic
Taking you step by step through the process, Tim starts by covering the basic principles of working with multipass rendering and exporting 3D information from your CINEMA 4D scene over to your After Effects projects --- ensuring you use the correct colour management for outputting from CINEMA 4D and configuring your After Effects projects to make sure the files are composited in the right environment.
Tutorial 2: Cinema 4D to After Effects Advanced
The second tutorial then moves on to some more advanced techniques including the use of XPresso to export 3D information from specific clones and outputting lights as separate render passes. This information is then imported into After Effects and the 3D data used in combination with third party effects such as Trapcode Particular and Video Copilot Optical Flares.
Tutorial 3: After Effects to Cinema 4D
Finally, Tim takes us through the process of transferring your After Effects information over to Cinema 4D. Using The Foundry Camera Tracker, you will track and solve some footage, resulting in an After Effects camera and reference nulls being created. This camera and null information will be exported from After Effects into Cinema 4D and used to build some basic proxy geometry for catching shadows and reflecting the environment. This is then output using Cinema 4D's multipass rendering and composited back over the original footage in After Effects.
Cinema 4D to After Effects Basic: Part 1 (~25mins)
In the first part of the tutorial, Tim shows you how to install the Cinema4DAE plugin into After Effects and walks you through the setup for the free iPod model. In Cinema 4D, you will animate the iPod model and a scene camera, manipulate the animation curves in the F-Curve manager, create some basic materials, and use the Layer Manager for organising the scene.
See other tutorials about Cinema 4D and After Effects:
http://www.youtube.com/playlist?list=PL099EA0C53AED93E6&feature=plcp
-----
Tags and Topics
Browse our collection to discover more content in these categories.
Video Information
Views
80.0K
Likes
277
Duration
25:27
Published
Apr 3, 2012
User Reviews
4.1
(15) Related Trending Topics
LIVE TRENDSRelated trending topics. Click any trend to explore more videos.
Trending Now