Step-by-Step Guide to Grading from Building Footprints in Civil 3D 🏗️
Learn how to efficiently grade around building footprints in Civil 3D by creating slopes, pads, and grading objects. Perfect for civil engineers and designers looking to improve site plans!
Autodesk786
321 views • Jan 15, 2025
About this video
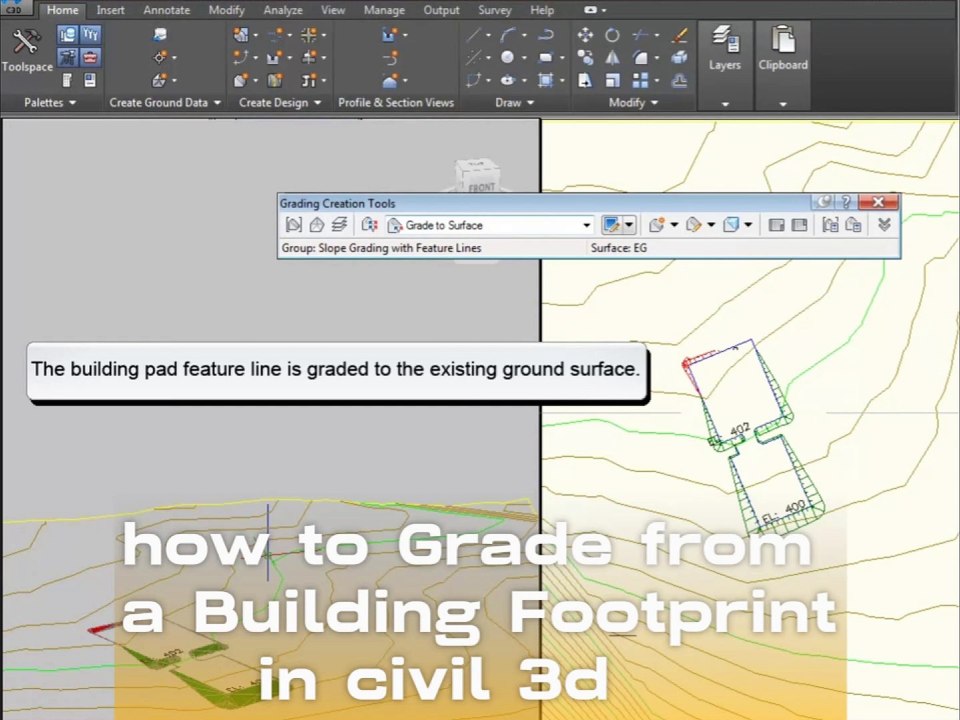
Grading from a building footprint in Civil 3D involves creating slopes, pads, or grading objects around a predefined building outline. This is often done to establish proper drainage or to prepare a site for construction.<br /><br />Steps to Grade from a Building Footprint<br />1. Prepare the Drawing<br />Ensure the building footprint is represented by a closed polyline or feature line in the drawing.<br />Verify that a surface (e.g., existing ground) is present for reference.<br />2. Convert the Footprint to a Feature Line<br />If the building footprint is a polyline:<br />Select the polyline.<br />Go to the Home tab Create Design panel Feature Line Create Feature Line from Objects.<br />In the dialog box:<br />Assign a name to the feature line (optional).<br />Set the desired style.<br />Ensure it's assigned to the correct site.<br />Click OK and elevate the feature line if necessary.<br />3. Assign Elevations to the Feature Line<br />Select the feature line and open the Elevation Editor from the Modify tab.<br />Assign elevations to all vertices of the feature line:<br />Use a constant elevation for flat building pads.<br />Adjust elevations for sloped building designs.<br />Alternatively, assign elevations based on the surface by selecting Elevation from Surface under the Feature Line tools.<br />4. Create a Grading Group<br />Go to the Home tab Create Design panel Grading Create Grading.<br />In the Create Grading Group dialog box:<br />Assign a name for the grading group.<br />Enable Automatic Surface Creation to generate a new surface for the grading.<br />Configure volume base surfaces if necessary (optional).<br />5. Apply Grading to the Footprint<br />Open the Grading Creation Tools:<br />Select the Feature Line as the baseline.<br />In the toolbar, define the grading criteria:<br />Cut/Fill Slope: Define slopes or ratios for cut and fill.<br />Target Surface: Choose the existing ground surface for reference.<br />Specify grading direction (e.g., grade to surface, to elevation, or by distance).<br />Click to apply grading around the feature line.<br />6. Edit the Grading Design<br />Adjust the grading parameters using grips or the Grading Editor.<br />Modify slopes, elevations, or extents of the grading as needed.<br />7. Create a Finished Surface<br />If a Grading Group Surface was enabled, Civil 3D automatically generates the surface.<br />Refine the surface:<br />Add breaklines from the feature lines and grading objects.<br />Adjust triangulation if necessary.<br />8. Analyze the Grading<br />Use the Analyze tab to check slopes, volumes, or other parameters.<br />Confirm that the grading meets drainage and site design requirements.<br />Tips<br />Grading Styles: Customize grading s
Video Information
Views
321
Duration
1:45
Published
Jan 15, 2025
Related Trending Topics
LIVE TRENDSRelated trending topics. Click any trend to explore more videos.
No specific trending topics match this video yet.
Explore All Trends