Step-by-Step Guide to Creating Pressure Networks from Objects in Civil 3D 🚰
Learn how to efficiently create pressure networks from polylines and features in Autodesk Civil 3D with our easy-to-follow tutorial. Enhance your civil design projects today!
Autodesk786
831 views • Feb 15, 2025
About this video
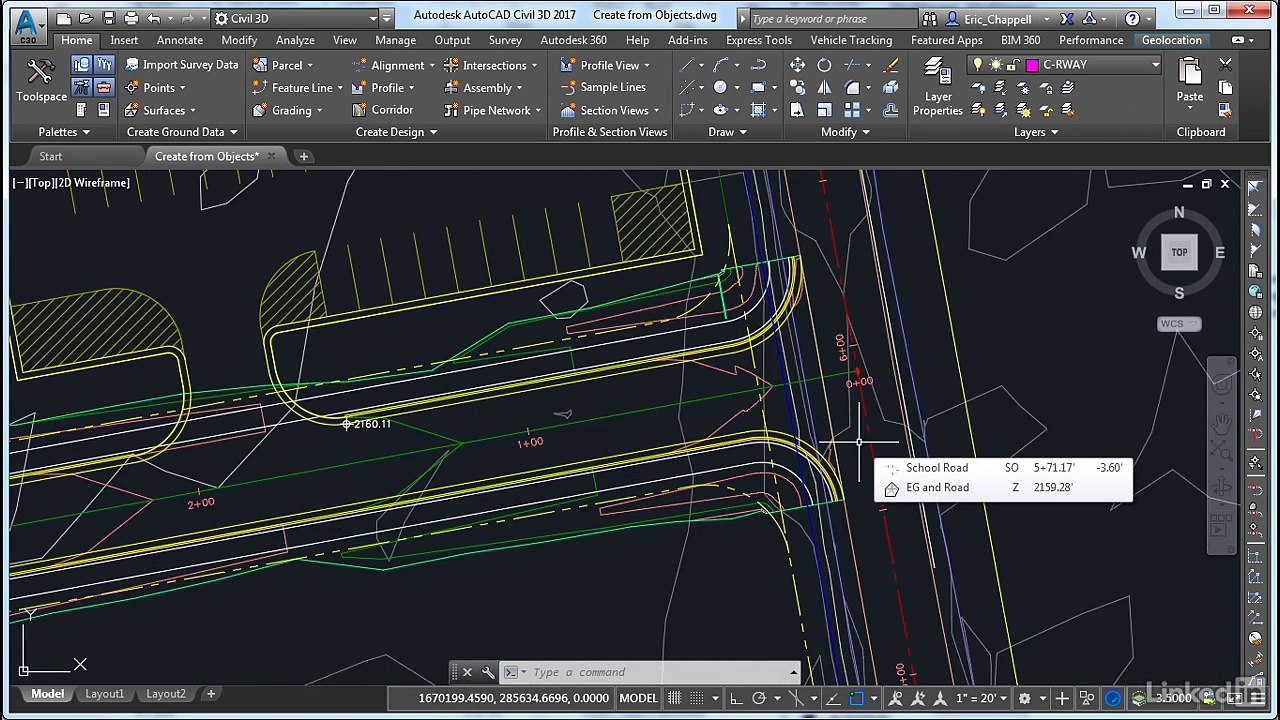
Creating a Pressure Network from Objects in Civil 3D<br />In Autodesk Civil 3D, you can create a Pressure Network from existing objects such as polylines, feature lines, or survey figures. This method helps convert preliminary designs into a functional pressure system with pipes, fittings, and appurtenances.<br /><br />Steps to Create a Pressure Network from Objects<br />1. Prepare Your Drawing<br />✅ Ensure that you have a polyline (or other linear object) representing the pipe layout.<br />✅ Check that the polyline is elevated correctly if necessary.<br /><br />2. Open the Pressure Network Creation Tool<br />Go to the Home tab → Create Design panel → Pressure Network Creation Tools.<br />Select "Create Pressure Network from Object".<br />3. Select the Polyline<br />Click on the polyline (or other linear object) you want to convert.<br />Press Enter to confirm the selection.<br />4. Set the Pressure Network Properties<br />A dialog box will appear where you need to configure:<br />✅ Network Name → Assign a unique name.<br />✅ Parts List → Select the appropriate parts list (pipes, fittings, appurtenances).<br />✅ Pipe Type → Choose the correct pipe material and size.<br />✅ Surface Reference → Set a surface to control elevations (if needed).<br />✅ Alignment Association → Assign an alignment for better coordination.<br /><br />Click OK to proceed.<br /><br />5. Convert Polyline to Pressure Pipes<br />The system will automatically convert the polyline into pressure pipes.<br />Bends, junctions, and fittings will be added based on geometry.<br />Use the Modify Pressure Network tools to refine pipe connections.<br />6. Adjust Pipe and Fitting Elevations<br />Use the Edit Pressure Network tools in the Modify tab.<br />Set elevations manually or assign them to a reference surface.<br />Use grips to adjust bends and fittings.<br />📌 Tip: Use Profile View to check pipe elevations and adjust them accordingly.<br /><br />7. Review and Finalize the Network<br />✅ Check connections and fittings for accuracy.<br />✅ Adjust labels and styles for clarity.<br />✅ Generate pressure network profiles for further design analysis.<br /><br />Key Tools for Editing & Managing Pressure Networks<br />Tool Function<br />Edit Pressure Network Modify pipe and fitting positions<br />Add/Remove Fittings Adjust pipe junctions and bends<br />Swap Parts Change pipe size or material<br />Profile View Editing Adjust pipe elevations<br />🚀 Final Tip:<br />Regularly validate your pressure network by using Object Viewer and 3D views to ensure accuracy.<br /><br />Need help with a specific issue while creating a pressure network
Video Information
Views
831
Duration
5:31
Published
Feb 15, 2025
Related Trending Topics
LIVE TRENDSRelated trending topics. Click any trend to explore more videos.
No specific trending topics match this video yet.
Explore All Trends