Step-by-Step Guide to Creating Multiple Sample Baselines in Civil 3D 🏗️
Learn how to efficiently create and manage multiple sample baselines in Civil 3D with this comprehensive tutorial. Perfect for civil engineers and Autodesk users looking to streamline their workflow!
Autodesk786
388 views • Jan 27, 2025
About this video
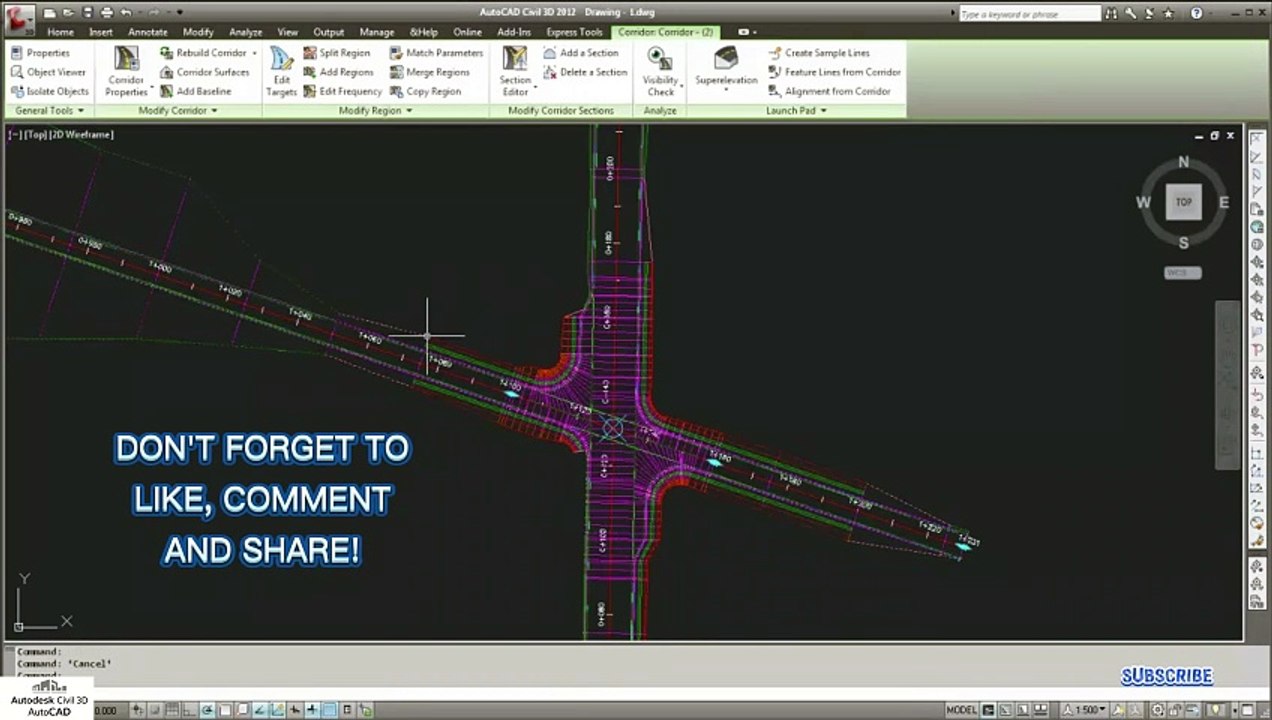
https://dai.ly/x9d2fm6<br />https://dai.ly/x9d176m<br />https://dai.ly/x9cytxm<br />https://dai.ly/x9cyqdo<br />https://dai.ly/x9cyhh4<br />https://dai.ly/x9cvrfi<br />Creating sample multiple baselines in Civil 3D allows you to extract surface data for multiple baselines in a corridor, helping with cross-section analysis and design. Here's a step-by-step guide:<br /><br />1. Understand the Concept of Baselines<br />In a corridor, baselines represent:<br /><br />Alignments: The horizontal geometry.<br />Profiles: The vertical geometry associated with each alignment.<br />A corridor can have multiple baselines if it includes multiple alignments (e.g., main road, side roads, or ramps). Sampling multiple baselines involves extracting surface information along these alignments.<br /><br />2. Prepare the Corridor<br />Ensure your corridor is built with multiple baselines:<br />Select the corridor and go to Corridor Properties.<br />In the Parameters tab, verify that the desired alignments and profiles are included as baselines.<br />3. Create a Sample Line Group<br />Sample lines are used to define cross-sections along the alignments.<br /><br />Go to the Home tab Profile & Section Views panel Sample Lines.<br />Select the alignment for which you want to create sample lines (e.g., your main baseline).<br />In the Create Sample Line Group dialog box:<br />Name the sample line group (e.g., "Main Road").<br />Select the surfaces or corridor data to sample (e.g., Existing Ground, Corridor Top, etc.).<br />Click OK.<br />4. Add Sample Lines for Multiple Baselines<br />Repeat the process for each additional baseline in your corridor:<br />Select the Sample Lines tool again.<br />Choose the secondary alignment (e.g., side road or ramp) as the baseline.<br />Create another Sample Line Group for this alignment.<br />Define sampling intervals or manually place sample lines for the selected alignment.<br />5. Visualize the Sample Lines<br />Sample lines for all baselines will appear in plan view.<br />Each baseline will have its own set of sample lines, grouped under its alignment in the Toolspace Prospector tab.<br />6. Create Section Views for Multiple Baselines<br />Go to the Home tab Profile & Section Views panel Section Views.<br />Click Create Multiple Views to generate section views for each alignment.<br />In the Create Section View Wizard:<br />Select the Sample Line Group for the desired baseline.<br />Customize the section view settings (e.g., grid spacing, band sets, etc.).<br />Repeat this process for each baseline’s sample line group.<br />7. Compare and Analyze<br />Review the section views for each baseline.<br />Use the Section Editor to adjust, add, or remove features in the sampled data.<br />8. Generate Reports (Optional)<br />To analyze and export the sampled data:<br />Go to the Analyze tab Reports and Tables panel Sample Line Reports.<br />Generate a report for each baseline's sample line group.<br />Tips:<br />Use consistent intervals for sample lines across baselines to simplify comparisons.<br />For complex corridors, assign clear names to baselines and sample line groups for easy identification.<br />Enable Automatic Rebuild for the corridor to ensure all baseline data updates dynamically.
Video Information
Views
388
Duration
2:41
Published
Jan 27, 2025
Related Trending Topics
LIVE TRENDSRelated trending topics. Click any trend to explore more videos.
No specific trending topics match this video yet.
Explore All Trends